A Great artist once said "Castles made of sand fall in the sea, eventually". I say, not if they're carved from EPS and coated with an isocyanate polyurethane resin...and installed a fair enough distance from the ocean. Immediately upon the completion of the Dolphin Sofa for SFDS, I went to work on these sand castles. While the basic geometry of these pieces seemed simple enough, their textures demanded a lot of time and attention.
Once the basic shapes were assembled, and the television monitor was properly fitted, all 3 pieces required staggered block patterns. This represents a lot more work than many would guess. The patterns were first measured and drafted over the majority of the surfaces. In the case of the tables, all sides required detail, where as the video cabinet has a smooth back. The drafted patterns were then hot scored into the surfaces and all of the pieces were tied together and further textured with joint compound before hard coating and paint treatments were applied.
The play tables center spaces were filled with sand and sea shells and topped with glass and plexi. The video cabinet was not only fitted with a 52"monitor but an Xbox and other ancillary digital goodies. The sunglass on the far end of this shot sport double monitors (the shades were cut on the CNC machine, I merely glued the parts together and rounded the edges). All of the wonderful stools and beach ball chairs were designed and fabricated by SFDS. In the end an incredible childrens play space was created, one that will host and inspire much joy and laughter for many years to come.
I'd like to further thank Eric Winston and SFDS for providing me with and allowing my use of their images of the pieces installed in their intended environments. Every aspect of working with this fine studio was a pleasure and a privilege. I happily look forward to my next projects with them.
Showing posts with label design. Show all posts
Friday, March 14, 2014
Sunday, October 27, 2013
Saturday, October 12, 2013
Rags A GoGo 3d
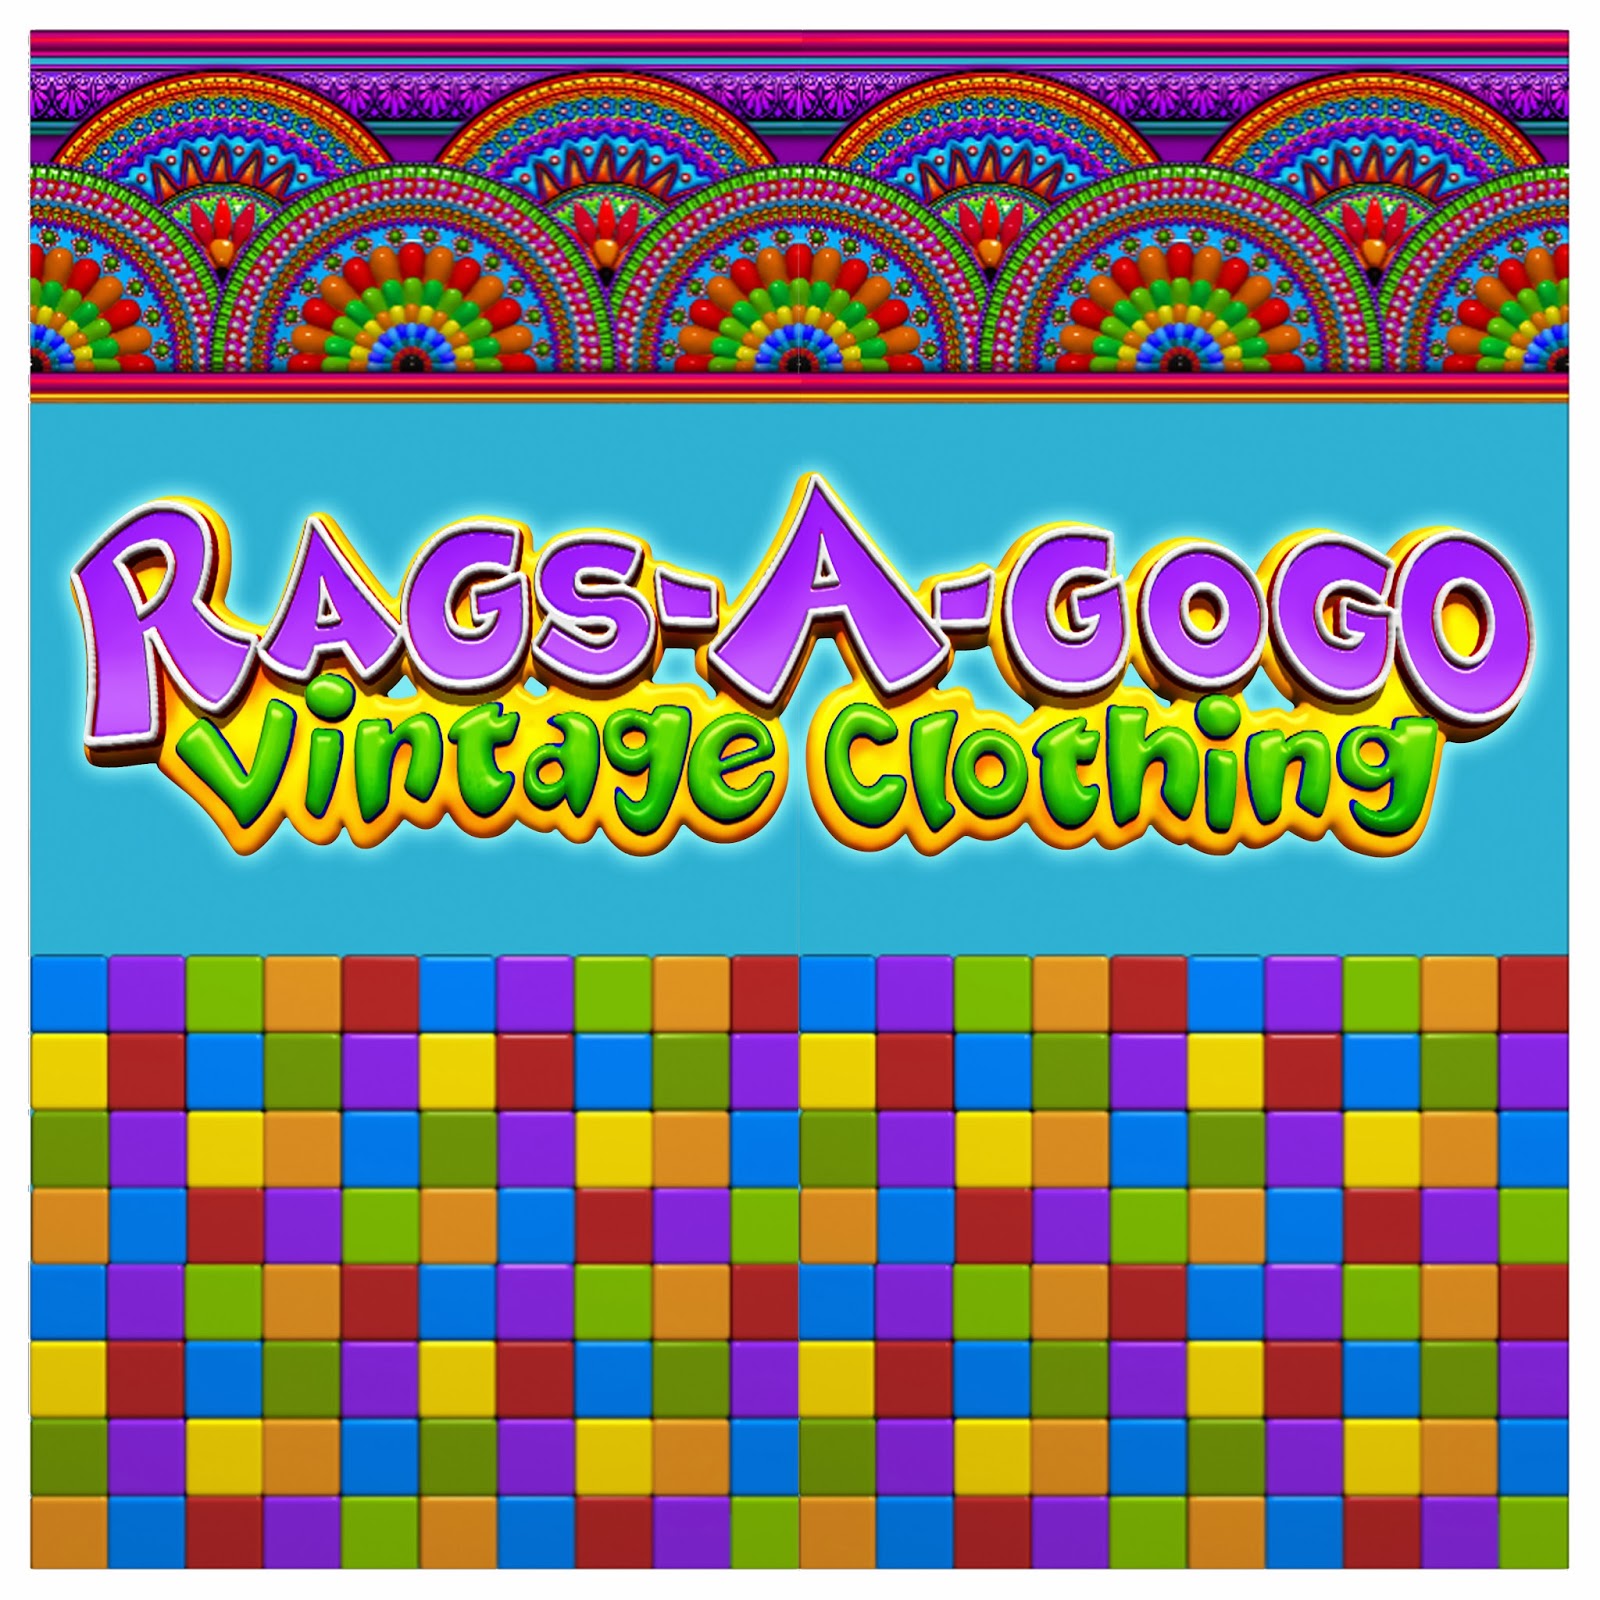
The image above is a Photoshop mock up that's incorporating the 3d logo, rondels and tiles. The mural with the stars and earth already exist as five painted panels that install in about two minutes. They are removed in about half that amount of time and are then stored in between the entrance and the rolling gate. This design feature and daily ritual exist in order to protect the mural from graffiti during the hours in which the store is closed. The tiled border at the bottom of the mural will simply be painted in the same manner as the rest of the mural. The banner across the front of the awning will be printed on vinyl and attached with double stick foam backed tape that is expressly designed for that purpose. The awning which is currently yellow will be painted with vinyl paints. The panels will alternate between red and blue.
Inside, the front of the store will feature 22" vinyl borders running just below the ceiling. The rear, lower portion of the stores plan, AKA "Chick Pit" will feature a 46"enlargement of the same border design. Visible walls will be painted a lovely sky blue. The floor tiles will be primed and painted with commercial floor enamels in a random pattern of primary and secondary colors.
All of the components for the border design were modeled in Zbrush with Alpha extrusions, radial symmetry tools and polypaint. The models were then rendered and brought into Photoshop for assembly, adjustment and print preparation.
Monday, September 30, 2013
Octopus Monster Game Asset
This is the third asset for the game project. My client asked me for an Octopus monster to chase the Skycycle through the strange and twisted landscape. It had to be an Octopus but, it had to be fierce in a more than simply Octopus sort of way. There's quite an assortment of bits in this beast. A bit of dragon and dinosaur, a bit of croc and bug, claws like grappling hooks and a nightmarish mouth that you wouldn't want to kiss. I wanted the creature to be an iridescent green akin to a scarab but not as dark. I also had to maintain it's fleshiness so that it can breath and jet around once fully animated. It's easy to dream on creature amalgamation. A creature of this kind could see so many different variations.
Thursday, September 26, 2013
Stephen Colbert Portrait, Bust, Cube X 3d Print
This little ABS bust of Steven Colbert is 6" tall and took about 13 hours to print, at medium infill and resolution on the Cube X. Like the other Cube X prints, this wasn't my first attempt. I contacted Cubify support and asked for advice. They told me to try a smaller medium resolution print set to medium density without detail preservation. I gave it a shot and this is what I got. I applied painter's tape to the build plate and then applied Magic Glue to the tape. It seemed to work but, an hour or so into the print I notices that while the ABS was sticking to the tape it was also curling with enough force to pull the tape away from the build plate. As I've read more and more, it seems that the only way to get consistent, undistorted ABS prints ( that actually stick and don't move around)is to invest in a heated build plate. They cost about $500. Ugh. Aside from the distortion in the lower part of the pedestal (will be corrected with sculpt epox) its a fairly remarkable print. It didn't come out of the machine looking like this however. I've put 6.5 hours into finishing this and could easily put another 4 or 5 hours into it before it would be ready for molding. Most of the support material did simply snap off with the exception of the scaffold supporting the chin. That bit of support required some radical carving in order to get to the intended forms beneath it. There were also two areas of this print that were a step out of register, one, through the center of the pedestal and, two, across the shoulders and through the center of the necktie's knot. They required a fair share of finessed carving and sanding to hide. All of that Said, ABS is a lovely plastic to work with. It carves and sands out very nicely and the majority of its striations can be buffed out with acetone. In fact, when applied sensitively, acetone can buff this plastic out to a finish that very closely resembles polished marble.
SHOCKING NEWS FLASH!!!... STEPHEN COLBERT COMES OUT OF THE CLOSET AND OPENLY CONFRONTS HIS INFLUENCE ON THE MARIJUANA NATION. FOR MORE IN DEPTH DETAILS ON THIS GROUND BREAKING STORY AS IT UNFOLDS, PLEASE CLICK HERE!
Monday, September 23, 2013
Game Environment Set Tile
The difference between microcosms and macrocosms is contextual. The difference between miniatures and monuments follow the same suit. Visually its a matter of placing the viewer on a sliding scale that can either put them inside of the scene with its elements towering above them a la' Honey I Shrunk the kids or, outside and above wherein the scene is simply a strange and tiny tile littered with an eruption of fantastic fungi.
Each element within the tile is a separate set piece that can be individually edited, textured, distorted, scaled or, rearranged. In order to create a continuous loop for the Skycyles to fly through, the tile is copied and rotated to present a different entrance aspect of the scene than the first tile. The rotated duplicate tile is then placed after the first tile to effectively double the length of the set. Since the Set Tile has 4 elevation sides, this process can be repeated 4 times before an image or point of view is repeated.
As these scenes represent an early stage of development, not much has been done with texturing yet and in truth I'll be sorry to obscure some of the beautiful, stretched polygon patterns but, it'll be all the more mind blowing textured as striated desert stone.
Many more Set Tiles have been discussed, mecha tiles, ruins tiles, tunnel tiles and the like. In the end, a mosaic of interchangeable set and scene transitions will be created.
In the animation the shapes get pretty crazy as they go sweeping past on the turntable. I can't wait to see tiny Skycycles flying through it from different points of perspective.
Wednesday, September 18, 2013
Moon Bird Cube X 3d Print
Joan Miro's Moon Bird occupies a special place in my heart as its the first true piece of sculpture that I can recall. It is also the first piece of modern sculpture that I had attempted in Zbrush. The Cube X has the largest build area of any desk top deposition printer currently on the market so I figured lets see what a 9.5" tall Moon Bird looks like. So far, it hasn't meant to be. It required 6 attempts just to get the base to stick. After abandoning Cubify's Magic Glue, being unable to make it work no matter weather or not it was fully dry or slightly tacky, I ended up using blue masking tape. It seemed to be working but then one end of the base started to curl up. As irritated as I was by this, I decided to let it run its course to see what would happen. I let the machine continue to run and went out for the evening. When I returned, I found that the print had stopped half way through the head. The Machine's dialog box read "File Read Error File Line 407595". I have no idea what that means. In order to see if it was a problem with the model I printed a smaller version. 9 hrs. and 44 minutes later I had a 4.5" tall Moon bird. Initially I was pleased just to have something but, upon closer inspection, I found the model to be fairly crude and to make matters worse, the support material was completely fused to the model. The support material is supposed to simply snap off of the model but, this was not the case. It took more than an hour to get most of the support material off and there are still some pretty serious scars that are in need chasing.
Another worrisome aspect to the print is the lumpiness of the base or floor. It almost seems quilted and as such would be impossible to efficiently iron out, so to speak. I suspect that this is a result of using the lowest infill setting. Future models will be attempted with with medium infill.
Monday, September 16, 2013
Business Card Quandary
I've been long overdue for a new business card for some time now. I went online to have a look at what artist's business cards are looking like these days. I wasn't amazed by anything ground breaking. I looked up sculptor's cards and was even less impressed. Of all of the cards that I'd looked at, make up artists seemed to have the jazziest layouts. So I went with a layout that slashes diagonally through a quarter of the central field or picture area. I laid out all of the type and information and then started to drop images behind them. Never being quite happy with one, I pulled up on the hand brake at 24. As a result of this mild mania, I now have 3 new card sheets. If I'm running low on cards, I can just print and trim a sheet or 2 and be out the door with a card case that sports numerous examples of my work. Maybe it sounds nuts. It's certainly more work but, I've never done a run of 500 or 1000 cards that I didn't get completely bored with before half were gone.
Sunday, August 11, 2013
Rags A GoGo Re-Think
Rags A GoGo is a fantastic vintage clothing store at Joshua Suzanne, the stores owner has decided to celebrate her recent lease renewal with a store make over. The store's interior will soon be as colorful as the owner and much of her stock. The hoped for effect is fashion fun house, somewhere between Sargent Pepper and Saturday Day Night Fever via The Yellow Submarine.
218 west 14th street, NYC.
The stores entire perimeter is occupied with clothing racks, meaning that there really isn't much in the way of exposed walls with the exception of small areas above the racks. In the front portion of the store, that area constitutes a 2' boarder, in the back of the store, which steps down 2' the boarder expands to 4'. There is however a lovely 10' x 15' wall over the stairs in the "Chick Pit".
In the past, I had talked to Josh about murals but the prospect of painting such things is messy and time consuming especially amidst so much stock. I had theorized that the mural could be painted on panels much like the facade and simply hung in position but, it would still be a huge amount of work. Fortunately we live in a day and age of some remarkable technologies. Eazy Wallz is a company that specializes in self adhesive mural systems. They will
print almost any design, any size and allow you to hang it quickly without the muss and fuss of wall paper glue. the design possibilities are petty much without limits.
Josh loves the psychedelic kaleidoscope and the royal blue with yellow and orange piping and she digs the striped shelf surfaces but, is still undecided on the striped floor. The issues of showing dirt and durability are understandably her main concern there. While I was researching modern vinyl flooring I came upon lots of stripes mostly done with 5 mill pavement tape. Having worked with pavement tape in the past, I know that it's remarkably durable but, I do have my questions about how it will hold up to years of customer traffic. The floors most likely treatment will probably happen with paint. In the next renderings I'll replace the striped floor with a randomly colored checker board pattern which I think will nicely off set the kaleidoscope and pin stripes.
I thought that mannequins in the Chick Pit might be a fun touch and they were easy to find in the Sketchup 3d warehouse(as were the clothing racks stocked with boxy shirts) but, as I put this model together from floor measurement, I failed to remember that the rack beneath the mannequins is reserved for dresses, meaning that it is half again as tall as the other clothing racks in the store. This forgotten detail would place the heads of the manikins well into the ceiling, an interesting but, undesired effect.
Rather than getting bummed out by my oversight, I went on line to look for manikins in seated poses. I was rewarded with immediate success. There are some very groovy, sexy manikins out there for not a lot of bread.
Saturday, August 3, 2013
Relief Mesh Extrusions Based on Moses Hacmon's Faces of Water
Of all of the places that I've gone to and, all of the people whom I've met, in all of the time that I've been, Burning Man is beyond so much of what I had previously fathomed. Fascinating folks from one end to the other, like a universe of spheres within spheres, born from inner circles. In the spirit of splendid behaviours, it is a most exquisite flower forever unfolding.
Last year, among my many beautiful camp mates, I had the pleasure of Getting to know Moses Hacmon. Moses is a collaborative artist, photographer and architect from Israel. His most recent artistic endeavors revolve around a serious of photographic works titled "Faces of Water". Moses has captured something within this substance, of which we are all mostly made and, has brought forward details and nuances that have been hitherto unknown. Within his miraculous photos I find an inner spirit or writhing rhythms and relative comparative kinetic dynamics.
A couple of days ago, Moses had posted a new image from "Faces of Water" on Facebook. Upon my seeing it I was once again blown away. I immediately commented that 3d meshes could be extruded from the photography so as to create relief panels, thus bringing the work into an even more sculptural context. In my mind, I saw walls of water, frozen at room temperature yet still in possession of their flowing, fluid splendor. Words weren't enough. I had to build a model to see for myself.
I brought one of Mozes's photos into Zbrush as a gray scaled alpha mask and extruded it through the face of a cube comprised of 16,000,000 polygons. The resulting topologies were as startling as they are gorgeous. What started out as a single sample swiftly became six as I found myself compelled to fill the cube's five remaining naked planes.
If these extruded surfaces were printed through stereo lithography or, multiple other means of rapid prototyping technology, they could be applied to vast varieties of architectural contexts. In this it would be possible to read the microcosms of fluid dynamics though one's finger tips. The materials that these surfaces could be cast as spans the gambit from glass, metals, ceramics to varieties of plastics that could be optically clear to densely opaque. They could even be cast in ice, which in a way intrigues me the most as it would be a means of seeing water through water.
All of the mesh extrusions in this experiment were pulled though single alpha masks. While the resulting surfaces seem rich with detail, they could be much further enhanced, especially in terms of roll and rollick by applying multiple masks to each relief with different exposures. Done correctly, these forms would billow more closely to the sublime gradients and deep contrasts of Mose's miraculous explorations.
In the frequencies of this veritable mountain range's topology, I'm immediately reacquainted with the fluid dynamics that govern and shape what we generally perceive to be an immobile Earth's crust. In truth, our planet's surface is a ripple that has never stopped and, never will, till it's sucked into the sun like a droplet.
Wednesday, July 31, 2013
Stephen Colbert Portrait / Bust
Summer before last, Bre Pettis, founder of Makerbot was on the Colbert Report. Part of the segment revolved around scanning Stephens head in order to print a copy of it in the Makerbot. It was all pretty hilarious, as is usually the case with the Report. For that show, the sign off was done with a printed puppet head(a la ventriloquist dummy). Makerbot made the mesh of Steven's head available through Thingaverse, encouraging 3d folks to play with it or, mash it into variants. It was a big wow moment for me. I was just beginning to learn Zbrush at the time, expressly for the purposes of 3d printing and prototyping. I figured that having access to Stephen's gross geometry would make the portrait a piece of cake...so not so. The scan of Stephen's head is a frighteningly lumpy, bumpy, blob of a thing but, I was commited to the notion and charged into it's basic masses.
I set out to create a presidential style bust but, a little sillier. It was actually quite a bit of work and in the end, probably took as long as if I'd done it in clay. The big difference of course is that this can be printed or carved directly from the file. It's a suddenly strange and wonderful thing to be in possession of Stephen Colbert's head. He's mine to play with now...mwa ha ha ha!!!!
Labels:
3d printing,
bre pettis,
bust,
colbert report,
design,
head,
head shot,
makerbot,
michael ferrari fontana,
portrait,
rapid prototype,
red white blue,
sculpture,
stephen colbert,
thingaverse,
zbrush
Friday, July 19, 2013
Stacked Shapes
For the most part, these are vase and vessel studies with a couple of test prints and prints gone wrong thrown into the mix, juggled around and, reconfigured. The image reminds me of Louise Nevelson and her constructs of odd balusters and turnings, more often than not in black and white.
Three Versions of Charles Darwin
Charles on the pedestal is a medium resolution print and is 12 inches tall, His mask a high resolution print and is 11 inches tall and finally the little guy, high res. and 6 inches tall.
Saturday, July 13, 2013
Do Clowns Freak You Out?
I've heard lots of jokes about scary clowns or, how some people are just plain, old freaked out by them. I'd always thought that the jokes were funny even though I must admit that I never truly understood, having never been frightened by one myself... until sculpting this. You'd think that this clownishly happy face would engender joy with its broad toothy grin, wide, alert eyes and abundant topography of smile lines but, it doesn't, at least not in me. The more that I stare into it, the more I'm jarred and unsettled. It's so bugged out that it's hilarious. Perhaps he'd be best described as unsettlingly funny or, fearsomely friendly? Despite ambivalence and dichotomy, I find contagion in his liver lipped, shit eating grin.
I've always loved carnival and road side attraction sculpture, all of it goofy and some of the best of it is naive and hopelessly clunky. One of the grand daddy's of this genera is the Coney Island Funny Face.
In his earliest incarnations he's just so weird and mal-proportioned with his flat, half brained cranium. Through the years he's evolved though a dramatic morphology. The pinnacle of this evolution now exists in the variant that is proudly the mascot for Coney Island Lager. Hands down, he's the best designed of them all and the basis for this sculpt. The first time that I saw him emblazoned across the label I thought, what a great object this would be,... as a badge or a button or a bill board. I didn't include his piercings or facial tattoos in order to give him a more 1950's, fun for the whole family sort of feel.
He's next in line to be printed and will be a foot in diameter, as soon as a 16" tall Mr. Peanut is out of the MakerBot(printing in 3 sections).
Thursday, July 11, 2013
Return to Kong
Cragged ivory, chipped and scathed emerges from gums both shrinking and swollen to divinely dapple divided luminance upon engorged papillae or,... dig the shadows across the tongue. In this return to a long waiting model, I've changed it quite a bit for 3d print out. In the same way that Photoshop's paint is forever wet on demand, sculptures of a digital nature are forever pliant. In order to achieve a 9 inch tall print out, the mesh required being broken into 2 parts. A 4 inch base will be printed seperately and effectively raise the print out to more than a foot in height.I'm going to be doing a lot of this in my quest to find the outer limits of what the Makerbot can do in the way creating larger models.
What You See Before You Get
My Makerbot got sick and had to go back to the factory for a full examination. It has been determined, after lengthy observation that the poor thing is terminal. It's death knell, as it turned out was due to a faulty Mighty Board interface. In the middle of her labors, she'd just go off path, crash into the wall and shake violently(nearly as dreadfull to watch as a convulsing child). In truth, she's never been entirely well, despite some very handsome prints. Nor is this the first time she's gone back to the factory. In light of that and this most recently diagnosed problem, the good folks of the Makerbot support staff have decided to send me a new Replicator 2.
While I've been waiting for this new printer, which I pray will perform perfectly this time around, I've been preparing models for printing. Revisiting projects and exercises from a couple of years past is an interesting voyage through the ether of ones and zeros and poorly placed polygons from an earlier time in my development. In short, there's plenty to do about making a model print worthy, things that I wasn't aware of at the time that I had originally sculpted this. That said, this smooth girl between two wheels has, after a fair bit of modification, been made ready to ride into the realm of physical reality.
When this piece gets printed as a single figure with wheels, It will consume approximately half of the Makerbot's build area at 11 inches in length(Y), 6 inches tall(Z) and 3 inches wide(X). In order to print the divergent variation in the lower right corner, the model will be sliced down the center, effectively dividing the model into two separate component which would then be rotated to a side by side parallel, thus taking up the entire 6 inches of the X axis. Once printed, the two parts will be glued together along their sliced planes to create an object that is 3 inches wider than the Makerbot would normally print in a single go. As is always lovely about working in these new sculpting mediums, the luxurious standard of what you see before you get. When the PLA finally hits the build plate, I predict that the first iteration of this model will be printed in just under 20 hours.
Thursday, June 20, 2013
Jellio Logo and Frame, Zbrush Model, MakerBot Prints
Last year, I had the opportunity to create a gummy bear model for Jellio, a wonderful company that sells some very groovy things. The model that I created was initially designed to serve as the tool path for a 4 foot tall roboticaly carved gummy bear that was sent to Maaco for a glossy, gold automotive paint job. Thought the model was designed for that lovely prop, it has found it's way into numerous iterations in a variety of scales and applications. I've recently learned that the model will be used once again...for something bigger still. The pleasure of that said news set me dreaming.
The Jellio logo is a little treasure in and of it's self. Every time that I've seen it, I've imagined it inflated, weightlessly hovering as if it were full of helium, just barely touching the ground with the lower apex of J's curly que. It has a playfully timeless air to it much in the same way that the original Coca Cola logo does. The lovely thing about having a 3d printer is that you can have that imagined shape, physically in your hand in very little time. Once the Logo Zbrush model was completed and the mesh was processed into a tool path, the 6 inch by 9 inch prototype was printed in 14 hours 48 minutes. The model was developed and processed for print in a day, the next morning when I woke, my MakerBot greeted me with the prototype. It's was sculpted while I slept.
It was so pleasing to see the Logo in actual space, I had a need to see it re-applied and incorporated into a gummy bear theme. Having seen how well the little gummy bear model had served so many different scales for different products, I knew that what ever I designed within it's theme would work the same way. At first I imagined this as an eight foot tall trade show display but, as the design evolved I realize that it could serve any number applications from free standing picture frames to wall mounted mirror with the base serving as an integrated shelf. Of course round designs naturally lend them selves to clocks and egg timers. How cool would this be as and egg timer with the Jellio logo on its nob, flanked by Gummy Bear salt and pepper shakers. Architecture is where these shapes really get fun. Who doesn't love a beautiful occulous? Is there anyone out there who wouldn't want to live with a giant round window in their space? In building this 6 inch by 7 inch prototype which took 11 hours and 55 minutes, I immediately envisioned it on top of candy columns. I would be quite the grand entrance.
Penny Throne, Sculpture Chairs, Zbrush Models, MakerBot Prints
I've often been asked about the prices of my chairs. Generally my answer has been "a lot", the reason being that they are all hand carved and, carving is more work than most people whom haven't carved understand. I've never really been happy with that answer and wondered what if they were modeled in Zbrush and roboticaly carved? These models represent the first printed foray into exploring that question. With the exception of The Penny Throne's tiniest offspring, nestled safely in it's lap, all of these prints are approximately 6 inches tall. The large Penny Throne was printed at medium resolution without a raft or support. It took 8 hours and 43 minutes to print. It's baby was printed at high resolution and took 3 hours and 55 minutes.
The 3 Sculpture Chairs pictured below were processed and printed at the same time. The group resulted in a rafted and supported single, high resolution print that required 36 hours to complete or, about 12 hours a piece.
Charles Darwin Mask, Zbrush Model, Makerbot Print
I purchased my MakerBot Replicator 2 for the express purpose of it printing sculpture. In my researching the machine, I looked high and low for examples of printed sculpture spanning a large variety of historical genres. At first, I found unsurprisingly little but, about a year ago Thingaverse started to exhibit models that were derived from photogrammetery. For those of you whom are unfamiliar with the term, photogrammetery is a technology that builds 3d models by stitching a serious of relative photos together through a process of identifying common features and land marks within the photos and creating an algorithm that proportionally joins all of the photos into a 3d model. In other words, if you take a bunch of photos of something, there are programs such as Auto Desk's 123d Catch, that will turn it into sculpture. It's really that simple. It's an amazing way to capture gross geometry but, being photography based, shadows and reflections often confuse the process and much of the details often become unrecognizable lumps and bumps. The models can however be post processed and cleaned up quite nicely. The point is that I finally found examples of classical sculpture printed out by a Makerbot and knew by that, it would suite my intended purposes for the machine.For this rendition of Charles Darwin, I basically sliced the face and beard off of the bust that I had created in Zbrush. I decimated the polygon count to about a quarter of a million and brought it into MakerWare as an .stl file. I scaled the model for the maximum size and set resolution to high. The print is 10.5 inches high and 6 inches across. It took 19 hours and 43 minutes to print. To date this is one of the most interesting prints that I've pulled off of the machine. It stands as a great example of what the MakerBot is capable of. While the print is not without striation, a surprising amount of subtle nuance has made it through in the way of wrinkles and skin textures. It's a great proof of concept. I see by this that the machine could create life sized busts. My guess is that a life sized Charles Darwin bust could be printed in 8 sections and would probably require 150 hours of printing.
Wednesday, May 22, 2013
Toothpaste Caps
It's interest how similar configurations of the same geometric theme reoccur in varieties of shapes that we could easily mistake for others. At first glance the sharply creased pleats of this tapered, truncated cone could be any number of things, from lamps shades to cup cake liner to in this instance a toothpaste cap. The images above are the SLS out put of a model created in Zbrush. The images below are Zbrush renderings. There is a slight proportional difference between the art and the out put as seen here but, it is deliberate as the art work that I'd built the model over wasn't quite to the measurements specified in the drawing. This was pointed out to me by my vendor. In order to make the prototype comply with the spec dimensions, some adjustments were necessary, hence the slightly different appearance. Another interesting aspect of design and fabrication with these methods and mediums is scale. Having been told by the title of this blog that you're looking at a toothpaste cape, you may have assumed that the object pictured herein is perhaps an inch tall. Its actually 5" tall and 5.5" in diameter. It was designed as a form for a mold from which numerous casts will be made to adorn a very silly dental display.
Subscribe to:
Posts (Atom)