


After I had finished my gig with Kara Walker as lead sculptor for her Domino sugar factory giant sphinx project I received a call from Eric Winston, owner of SFDS. He asked me to come in to discuss a 26' tall Homer Simpson Head that had to appear as if it were buried half way into the ground. It also had to serve an exhibit space inside of it. I was very excited about this prospect for all sorts of reasons. I like doing big sculpture. Kara's piece was 75' long and 35' tall with a head that was 16' from chin to crown, the largest that I had ever carved by far. Homer's head would beat that measurement by a solid 10'. Furthermore, Homer's head would have a 24' diameter, nearly as wide as the building that I live in. In fact, as can be seen in the image to the left, his head in relationship to his full body would put him at roughly 125' in height. He was also going to be an enormously high profile project used as the centerpiece of FOX FX Simpson's world at Comic Con's San Diego Bayside Park. Perhaps what most attracted me to this project was the immensity of his dome and the jigs required to accomplish it. Having done many fairly large foam turnings in my career, I have theorized for years on how to make truly enormous ones on a monumental scale. This was clearly that opportunity. The cherry on top of all of this for me was the chance to do another giant Simpson's project. Way back in 1992, when I was the Chief Sculptor for the Macy's Thanksgiving Day Parade, the Simpson's were new comers to the cartoon scene, I worked on the creation of a 72' tall Bart Simpson helium inflatable.


As huge as the balloon was, I was only responsible for the 36" 1/24 scale model, it's fiberglass mold and subsequent casts. Though the inflatable was patterned directly from my model, i really didn't have anything to do with the balloons actual fabrication. Homer's head would be a full on, hands on fabrication that would require Eric's entire studio staff for more than a month. It's myriad components would occupy the majority of his 15,000 square foot studio. There would be so many large pieces and parts to this thing. Though Homer's head is composed from some very elemental geometry, cylinders and spheres really, there would be nothing simple about it. The jig for the eyes would be as big as a bathysphere, the jig for the dome sections, the size of a truck. The framing jig was pretty much the same size. The project would require more than 40 blocks of foam, a material that takes up space like no other and 1,200 pounds of hard coat would be used to make the dome sufficiently durable for it's intended purpose of being installed and reinstalled for various events and locations other than Comic Con itself.
I spent the day before my meeting with SFDS making these sketches in Photoshop and Zbrush in order to better explain how I thought it would be best to proceed. I knew from my last call with Eric that the dome would have to be divided into 12 equal sections that could be nested together for trucking. Since the dome was basically a hemisphere, it was a perfect object for lathing but, of course, no one has or, as far as I know makes a 24' x 12' lathe but, I reckoned, a jig with a pivoting swing arm with a lower following axle could emulate a lathe's basic actions constituting 1/12th of the domes diameter. A bow with a hot wire would be clamped to the swing arm in various descending positions and accomplish the radiuses with about 2 dozen cuts per panel. The Photoshop sketch also illustrates block optimization, a very important thing considering how much foam would be required to create a 6" shell thickness as well as demonstrating that each panel would only have 2 horizontal glue joints.

Aside from being pretty much the last word in organic digital modeling, Zbrush is also excellent for throwing quick shapes around in order to previsualize their relationships. The panel shape is easily seen suspended within the 3 blocks. Anything that wasn't the intended panel would simply have to be cut away. The sketch also shows the basic wing and bed arrangement, both of which would be key in configuring these shapes.
My sketches were more precisely interpreted by Kelsey in both AutoCad and Rhino and then uploaded vector by vector to the CNC machine. The parts were assembled and the jigs were born.
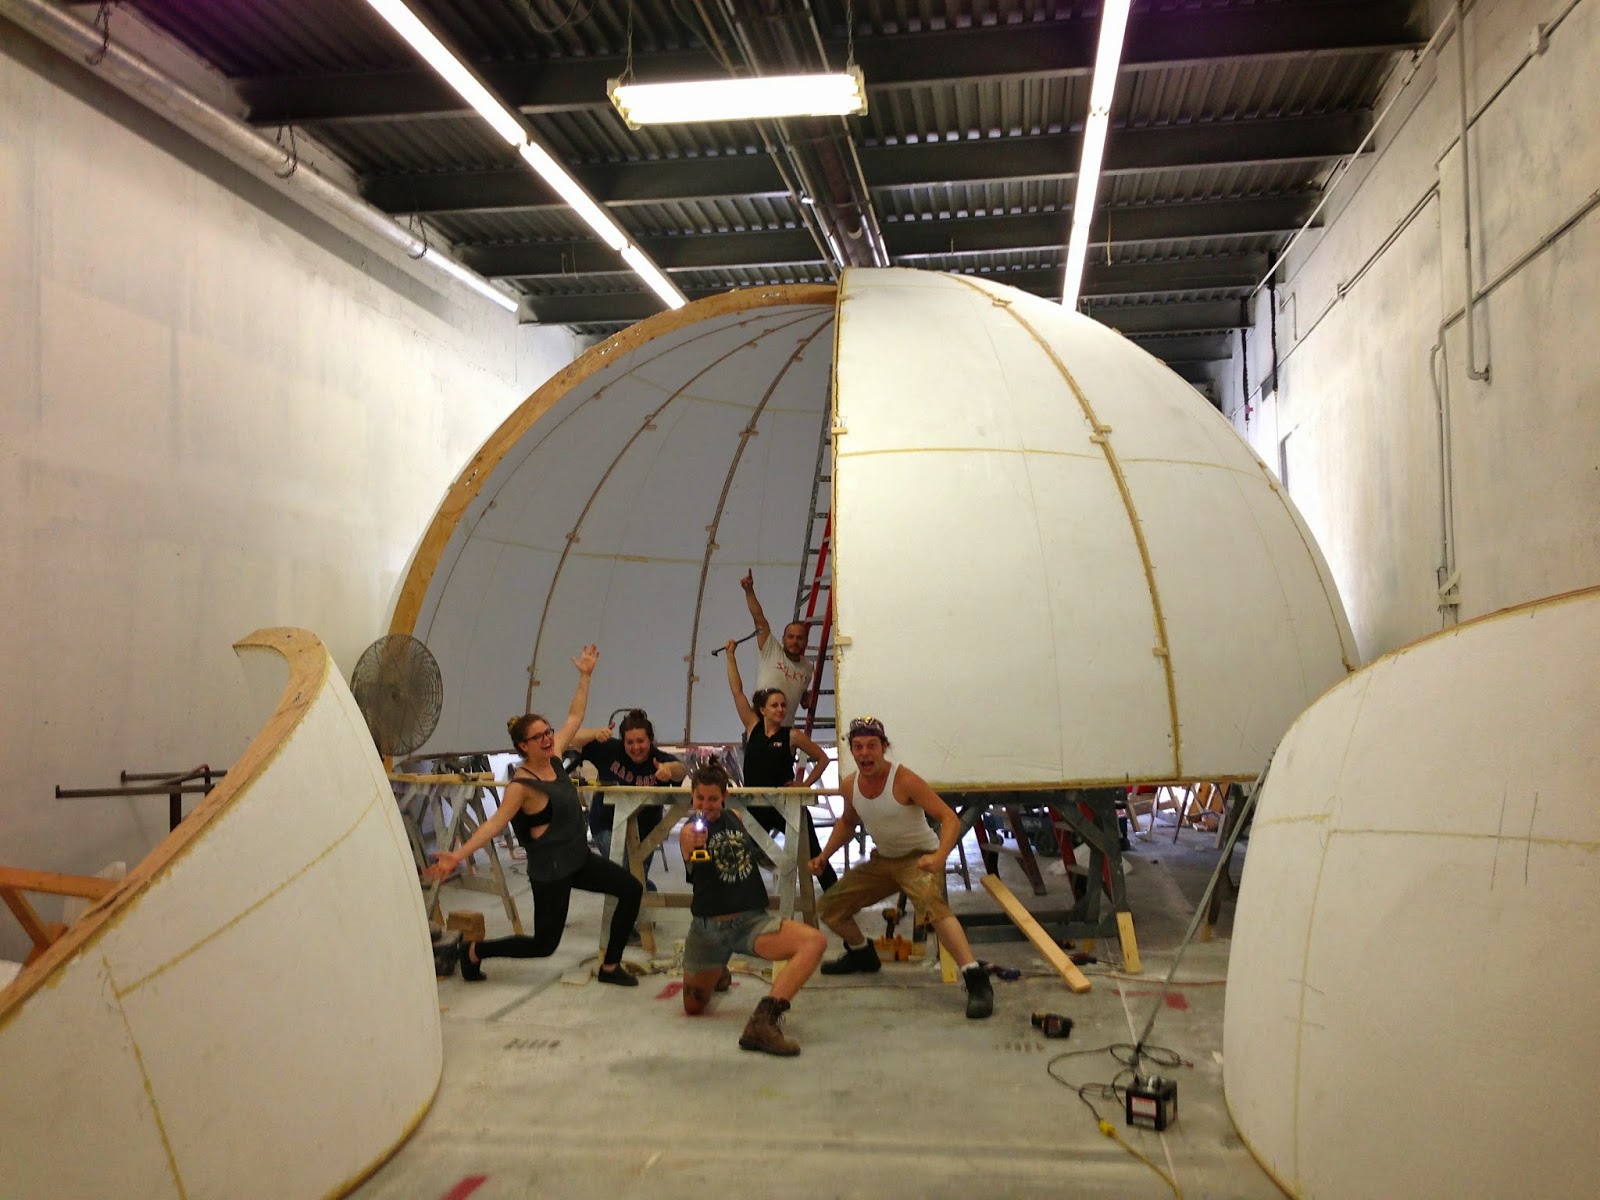
After the panels were cut on the first jig they were removed and married to the framing in the next jig.
Once framed, each panels interior side was profiled with a single hot wire cut in which the wire followed the framing. This was easily the most gratifying cut in the whole process as it yielded a near perfect curved plane in a single pass.
The eye ball jig was a similar lathing contraption that I've had in my head for years. It worked very much the same way utilizing a pivot and following swing arm in a vertical rather than horizontal orientation.
One of the trickiest cuts involved profiling the eyes to fit flushly against the curved walls that constituted the lower portion of Homer's head. After the eyes had be profiled they were fitted to sections of said curved walls and foam was injected around their perimeters to perfect the fit.
What would Homer's giant head be without a tiny (4'x4'x3') brain inside of it? After dealing with all of the complexities of creating simple shapes, the brain for all of seemingly convoluted complexity, was a delightfully simple, straight forward carve.
When all of the foam parts were completed, they were hard coated, sanded, filled,primed and painted.
Hands down, my favorite aspect of this project was that Homer's Head wasn't merely an enormous site gag on the lawn of San Diego's Bay Front Park, it was a theatre. The inside of Homer's dome was designed and created to serve as an immersive projection mapping screen. In the photo below, technicians and software engineers are working to calibrate and register the 4 projectors required to facilitate a seamless animation over the entirety of the dome's inner surface. The animation itself depicts Homer’s life flashing before his eyes as bits and pieces from every Simpson’s episode that has ever been swirls in extraordinary abstractions to promote Fox FX’s new
Everysimponsever app. To see an animation of this please click
HERE
This whole thing was a smash hit at Comic Con. There are so many rave reviews of it. It really was a show stopper, and it's all over the internet. It was a wonderful thing to have been so involved with.
For tons of fabulous articles and rave reviews please click HERE
Eric's team is second to none. Every one performed like a rock star from one end of the studio to the other. With major brain power and backs like bulls everyone there worked around the clock, day in, day out to create this wonderously hilarious thing. A first thanks to my team who trudged with me through the foam fabrication from beginning to end. They could not have worked harder. Their dedication and focus blew me away every day. Amanda, Fiona, Daniel, a million thanks to each. Your assistance in this project went beyond the beyond. To Mariana, Scott and Fred. They built the jigs which were nightmarishly complex beyond what most may suppose. Without their perseverance and craft, not a block would be cut. to Kelsey for taking my sketches, scribbles and unmeasured renderings and turning them into vectors that the robot could understand and Dodes for making sure that I would never want for what I needed, you guys are Awesome, as is everyone there. Last and most certainly most, Thanks for providing me with such an amazing sculpture opportunity and trusting in my vision of it's foam fabrications Eric, I'm so looking forward to the next big thing that I work on with you and your amazing studio.
For photos of the full build history please click
HERE
For Pinterest gallery please click
HERE


 So then, how does one make two stiff figures, lost in utter indifference to one another, embody love and intimacy? I started with a Sawsall and a really long blade and hacked the male figure to pieces. He started out as a seated figure and required merciless amputation of his head, neck, shoulders, elbows, wrists, knees and hips. All of those parts were repositioned and fiberglassed back together.


