

These two images are not photos. They are renderings generated in Keyshot and mark the end of my rendering models in Zbrush. I'll still be modeling in Zbrush but, wow what a difference in the quality of the imaging.


 I recently had a chat with a man about a pig. I can't really say much more on that other than it inspired me to create these little piggy banks for my pleasure and edification and perhaps a base mesh for relative future projects. The truth is that there have been plenty of pigs in my past. Large carvings, inflatables, fiberglass pattern models and molds. It would seem that my past is polka dotted with pigs. In My mind, the most famous pig aside from Porky and Ms. Piggy (pig's that I've never had the privilege to have worked on) is Pink Floyd's Pig balloon. As fate would turn out, I ended up working at the Macy's Parade studio with Scott Mcneil, the creator of that famed and emblematic rock and roll balloon from the years of my impressionable teendom. While I was with Macy's I would find myself involved with a plethora of pig projects and proposals. I carved a 7' long pig chasing a butterfly on his nose for Animal Planet. I sculpted balloon models, built their molds and did the casts for a 36' tall ballerina named Petunia and 70' long representation of Babe from the famed feature film. I've always been held a bit spell bound by the seemingly magical aspects of fashioning an object that can be held in my hands and having it enlarged to something as tall as an apartment building. Much of my career has been just
 that, starting with a small sketch or mechanical drawing and making something outlandishly enormous but, in recent years I've begun exploring the opposite end of that spectrum. Working in 3d allows to to go one way as easily as the other. Just as I can scale a model to be robotically milled in sections and assembled to colossal proportions, I can as easily reduce the model and make tiny prints. This of course also translates immediately into cost reductions as well. When considering all of the pigs that I've done, I decided to create a little still life that would illustrate variations on a base theme in terms of detail, material, miniature scales, price points and production time. 3d printing is the only way to take this notion through to fruition and the light of day. I began by building the simplest pig possible. I would essentially start with a ball and then pull all of pigs features out of it. Once the simple, smooth model was done to my liking I began detailed variants not only for the sake of design but also cost analysis. I reasoned that by eliminating different


As 'pig's ear' - Cockney rhyming slang for beer.
As 'in a pig's ear' - an expression of disbelief.
As 'make a pig's ear of ' - make a mess or muddle.

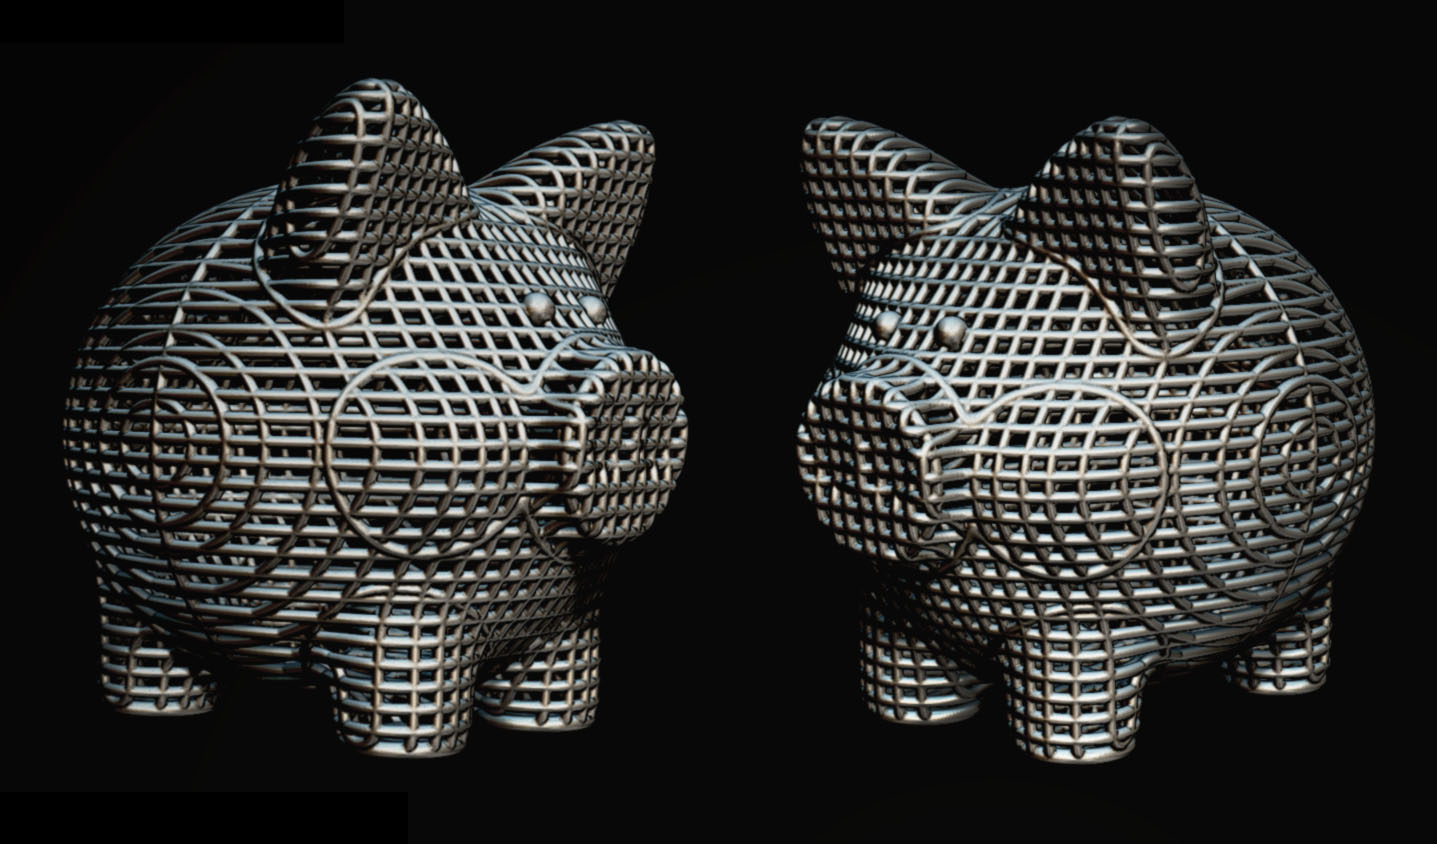
The following two images are derived from Shapeways renderings.


As I had mentioned earlier, I had reduced the surface area on 2 of the pigs not just to explore design variation but to reduce printing and material costs. When I submitted the Wire Frame pig, a price came back almost as high as the Steampunk design. I thought to myself, how could this be? I had removed pretty much half of it's surface and shell thickness. You would think that the logical answer would be that it should cost half as much. Logic loves to trick you with what you do not know. The cost of the print is determined not only by it's material use. It is also determined by the machine space that is occupied. The Wire Frame design only had a slot for coins, whereas the other two designs have large round opening though which a pocket full of change can easily by dumped. It also means that other models may be printed inside the pig. Thus allowing additional use of machine space that the slotted design wouldn't permit. I revised the design and replaced the slot with a larger round opening and the price came down to what I had originally anticipated.


No comments:
Post a Comment
Note: Only a member of this blog may post a comment.